



Fall is here, and after a sweltering summer the weather is finally cooling down. Before it gets too cold out, you might be thinking about planning some outdoor activities for yourself and others to enjoy, and a hike is a great way to get outside and see the changing of the seasons. Before you step out the door, you should plan and map your hike on your iPhone, and download it to your device so you don’t get lost.

When Apple released iOS 18 in 2024, it made some improvements in your iPhone’s Maps app, including the ability to create a custom walking route. These can help keep you on track without needing additional maps or equipment. This feature can also tell you the distance of a route, as well as what your elevation is while you’re on the trail. If you’re in Denver, I imagine it just says, “Up there.”

Here’s how to create your own custom route in Apple Maps on your iPhone.
Make a custom route on Apple Maps
1. Open Maps.
2. Either tap the blue icon marking your current location or long-press near where you want to start your route to drop a pin.
3. Tap the three dots (…) across the bottom of your screen.
4. Tap Create a Custom Route.
From here you have to plot your route by tapping around your map. You can tap intersections and landmarks — like restaurants and shops — and the app will start mapping your route. You can also tap intersections and unmarked locations on your map for a more granular approach to creating your route.
You don’t have to tap a location near your last route point, either. After you tap Create a Custom Route, you can tap a location miles away and Maps will create a route for you. It’s important to note that if you tap a location miles away from where you start your route, Maps will find a path that doesn’t involve busting through walls like the Kool-Aid man. In that regard, creating a route is just like getting driving directions on Maps.
While creating your route, Maps will also give you three route options if you tap your original location: Reverse, Out & Back and Close Loop. Reverse flips your route so where you initially started is now where your route ends. Out & Back maps your route on top of itself so you start and end where you began in a single path. Close Loop also ends your route where you started but for routes that are circular in nature.
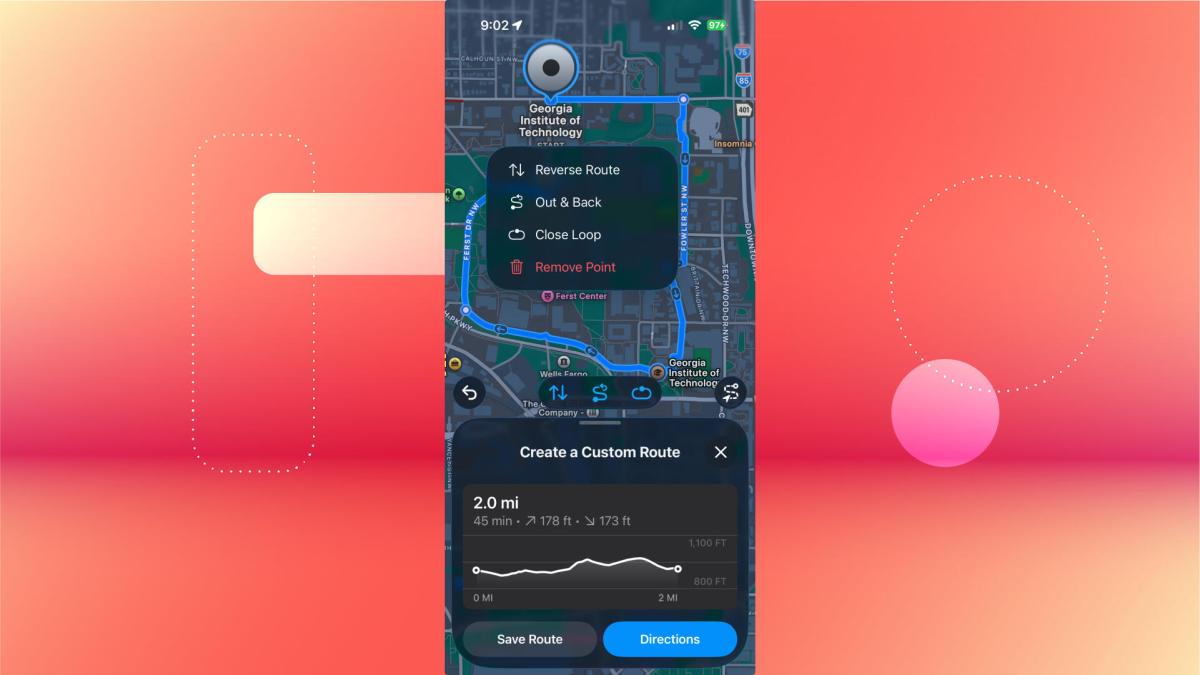
Maps makes it easy to close your loop or end your route.
Apple/Screenshot by CNET
Once you’ve created your route, tap Save Route and you’ll be asked to name your route. Then tap the blue check mark in the top right corner of the new menu. Maps will also download your custom route to your iPhone, so you won’t have to worry about losing reception, especially if you’re hiking out in the wilderness.
Where to find your custom route
After you’ve saved your custom route, it will be moved to your Library in Maps. Here’s how to access it.
1. Open Maps.
2. Tap your profile icon to the right of the search bar in Maps.
3. Tap Places.
4. Tap Routes.
5. Select the route you want to take.
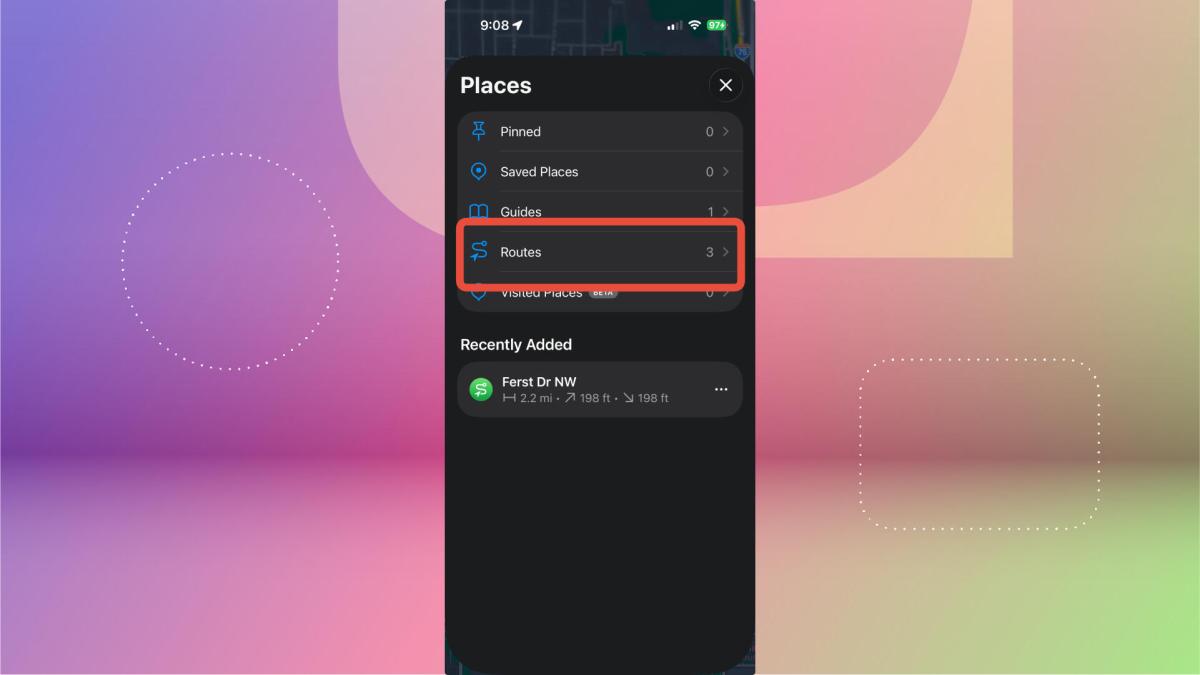
You can find your routes here, in Maps.
Apple/Screenshot by CNET
After selecting the route, Maps will pull it up on your map. If you’re near the start of your route, tap Go and your iPhone will give you directions along your route. If you’re not near the start of the route, you can tap Directions and Maps will show you how to get to the start of your route.
For more, here’s what to know about iOS 27 and why your battery might be draining faster after updating. You can also check out why the iPhone Duo will launch with iOS 27.1.

See full bio
Read the full article here