
Once upon a time, there was a small handful of at-home ice cream makers to choose from. Cuisinart made the best electronic versions — they still rock — while old-timey hand-crank machines offered a retro and muscle-building approach.
Cut to 2026, and there are dozens to choose from, each with a slightly different approach. Ninja’s $250 Creami, a favorite of CNET editors, makes ice cream in 2 minutes, though you’ll need to freeze your custard the night before and find space on the counter to store the machine.
KitchenAid Ice Cream Maker Attachment
Pros & Cons
-
Fairly inexpensive compared to leading ice cream makers -
Very easy to use, clean and store -
Yields an authentic soft serve-style ice cream -
Takes just 20 to 30 minutes to churn -
Allows for customization to create unique flavor profiles
-
Won’t satisfy immediate cravings without a prefrozen bowl -
You have to already own a KitchenAid Stand Mixer, which is pricy -
Attachment doesn’t easily slide into certain models -
Recipe instructions are inconsistent and/or lacking information
Compressor ice cream machines — Cuisinart and Breville both make one — churn ice cream without needing to freeze a mixing bowl or custard, but they’re bulky and expensive.
If you already own a KitchenAid stand mixer, there’s a handy ice cream attachment. At first glance, it makes a ton of sense for those already in possession of the iconic kitchen appliance, best known as the baker’s best friend.
To see if the stand mixer ice cream maker add-on is as simple and sensible as it sounds, I tested it myself. While it has some minor drawbacks compared with standalone machines, its approachable price and slight physical footprint make it a no-brainer for lovers of frozen dessert.
Here’s what I thought of KitchenAid’s $120 ice cream maker attachment.
How KitchenAid’s ice cream attachment works

The KitchenAid ice cream attachment arrives in three pieces: a connecting piece, a churning paddle (also known as a dasher) and an insulated freezer bowl.
To make ice cream at home, you’ll need to freeze the bowl for at least 16 hours before use. Once ready, it replaces any standard metal or wooden bowl on a KitchenAid stand mixer. The dasher is inserted directly into the bowl, while the attachment slides into the metal planetary to connect the machine head to its base (through the top of the dasher).

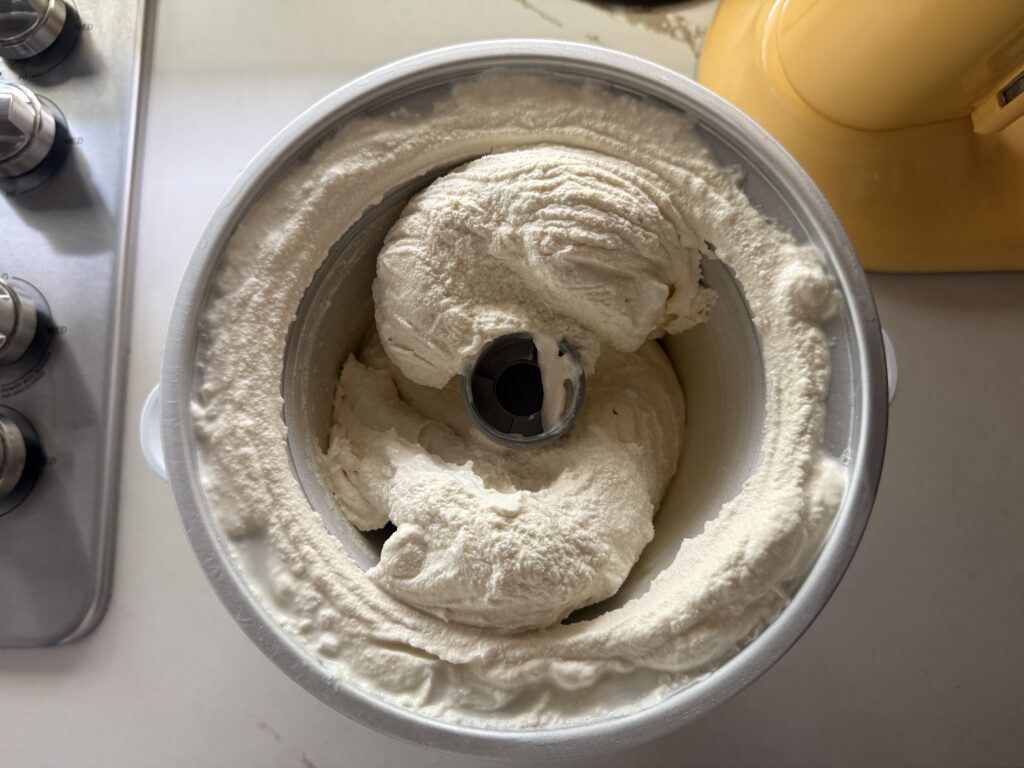
You should have prepared the ice cream custard in advance and preferably chilled it overnight. Pour it into the bowl and set the appliance to level one (stir mode) to begin churning. Ice cream will be ready in 20 to 30 minutes, depending on the temperature, the thickness of the liquid and the volume. If you have hard mix-ins such as chocolate chips, nuts, or coconut, you can add them halfway through the process.
What I made and how it turned out

To keep things as simple as possible, I chose to make KitchenAid’s vanilla ice cream recipe. Unfortunately, KitchenAid failed to provide ingredient measurements on its website, but after a bit of digging, I found the correct amounts in the company’s Product Help section.
As a cookbook author with plenty of ice cream-making experience, I doctored the recipe and simmered the following ingredients in a large saucepan over medium-low heat:

- 2 cups whole milk
- 2 cups heavy whipping cream
- ½ cup maple syrup
- 2 tsps. vanilla extract
- 1 tsp. vanilla paste
- Pinch of salt
I gently whisked four egg yolks in a small bowl, to which I added a half cup of the warm dairy mixture. Once blended, I poured it into the saucepan and continued mixing with a rubber spatula for 15 minutes, ensuring it never reached a boil.
If you’ve overcooked your egg yolks and your mixture becomes lumpy, pour the liquid through a sieve after removing it from the heat. Otherwise, transfer the liquid to a large bowl, cover with plastic wrap, and refrigerate for at least 3 hours. This is the custard that will be poured into the frozen bowl and used to make vanilla ice cream.

What I loved about the KitchenAid ice cream attachment
If you’ve already invested in a KitchenAid stand mixer, which I’d consider to be a kitchen staple, this attachment makes a lot of sense. It’s fairly inexpensive, easy to use, and, perhaps most important, dishwasher-safe (other than the bowl itself). It also yields 2 quarts of ice cream, which is more than enough to feed a small family.
The initial soft serve was delicious and anyone can customize the recipe with flavor and ingredient mix-ins. While I followed KitchenAid’s recipe by heating the ingredients on the stove, this step isn’t necessary. That said, incorporating egg yolks to create a custard will make your ice cream richer and is highly recommended.

Clean-up was also a breeze — I hand-washed the bowl (after it reached room temperature) and placed the paddle and attachment in the top shelf of my dishwasher.
What I didn’t like about the KitchenAid ice cream attachment
The attachment that is supposed to easily slide into the metal planetary didn’t fit in a Professional 6000 model. Instead, I was forced to crank the mixer’s side handle until it met the top part of the dasher to keep it securely in place.
While the texture was smooth and creamy upon initial churning, I wasn’t a huge fan of its icy texture after it hardened in the freezer for a few hours. This boils down to personal preference, but it’s worth noting for ice cream purists who expect a more velvety mouthfeel.
The insulated bowl also takes up a significant amount of space in a freezer, but it’s a requirement to make ice cream successfully. If it’s not frozen and ready to go, you’ll be unable to satisfy a sudden craving for something sweet and refreshing.
The bottom line
The Ninja Creami earns high marks for its ease and efficiency and is certifiably the industry leader in this space. There are also other ice cream makers that are even more affordable than KitchenAid’s three-part attachment. But if you’re a stand mixer connoisseur and have already splurged on accessories like a dough hook and pasta maker, this addition is a must-have and something to add to your culinary collection.
Make your go-to flavor combinations en masse and enjoy sundaes and splurges all summer long without having to shell out hard-earned cash and leave the comfort of your home. It’s the perfect way to treat yourself — literally — during oppressive heat and long work weeks that demand a bit of caloric indulgence.
Read the full article here